Getting started with AXC
To get started with the AXC protocol go to our website at
https://
AXC protocol permissionless products (Distributed Assets):
Deposit funds
Go to the Vaults section.
Select vault product.
Review vault product’s specifications, overview, key facts, dashboard and monthly attestation reports.
Connect your self custodial wallet for permissionless vault.
Deposit USDT/USDC into vaults.
Review terms and conditions and the product descriptions.
Receive RWA vault token.
Go to the Portfolio section and review your positions.
Withdrawing funds
Go to the Vaults section.
Select vault product.
Review vault product’s specifications, overview, key facts, dashboard and monthly attestation reports.
Connect your self custodial wallet for permissionless vault
Withdrawal RWA vault token from vaults.
Choose between Standard or Instantaneous v1 withdrawals. Standard withdrawals settle quarterly or weekly, depending on the vault product. Instantaneous v1 withdrawals settle immediately, however, capacity is limited based on the vault product.
Receive USDT/USDC.
AXC protocol permissioned/whitelist products (Represented Assets)
Contact hello@axc.xyz for whitelist/permissioned vault.
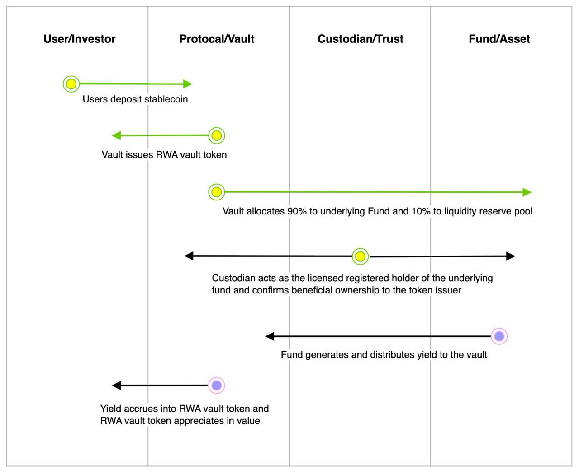
High Level Workflow